Tower A-2 and the interlocking complex known as Western Ave is located a few miles to the west of downtown Chicago where the present day METRA Milwaukee District crosses the METRA UP West Line. However back in the day the interlocking actually involves three railroads. The heart of the interlocking was where the Milwaukee Road's trunk line to the North and West crossed the former Chicago Northwestern Railroad's main line to the west through Iowa. There is where one four track main line met another four track main line at grade and the only solution was a set of diamonds. Actually, diamonds would have been simple blessing, sort of an Englewood of the north side, as the lines cross at about 30 degree angle which required a set of 16 double slip switches and movable point diamonds to be constructed. This is perhaps the largest such application of double slips and movable point diamonds to ever be installed in North America outside of a terminal location.
Just when you thought it couldn't get any better the Pennsylvania Railroad got involved. You see, the PRR didn't just have one route into Chicago. Aside from the familiar route via Fort Wayne, passing through the Quad Draws and 21st St Tower (aka Alton Junction), the PRR operated what was known as the Panhandle Route, named after the West Virginian panhandle through which its main line passed after splitting off the usual main line at Pittsburgh. The line continued on via Columbus, Richmond and Logansport, entering Chicago through the back door, running parallel to the B&OCT up through 75th St Junction and the Brighton Park crossing until it hit the CNW main line where it made a sharp right hand turn to curve back in toward the loop and the Chicago Union Station complex, rather ironically traveling the final miles to Chicago heading due east. This right turn is located at Chicago's Western Avenue and is also the point where the PRR Panhandle Route would merge with the Milwaukee Road's Chicago main line. Due to the PRR's 50% stake in the Chicago Union Station enterprise, this part of the line was equipped with position light signaling, making the junction at Western Ave a real Chimera with PRR, CNW and Milwaukee Road signals.

So let's take a quick look at Western and as you can see in this thankfully clear interlocking diagram, its layout borders on the insane. It is similar to the interlockings at either ZOO or Janacia in function, a major sorting and junction point where two trunk lines meet on their way downtown, but like I said this one takes the brute force approach instead of something more elegant with ramps and flyovers. The 83 lever US&S Model 14 interlocking is large, but still modest in size falling well short of at century mark at 83 total levers with 69 active. Like I mentioned before the real hallmark of this interlocking are the doubleslip switches and movable point diamond (MPD) crossings. Aside from the 4x4 crossing with its 7 doubleslips and 8 MPD's, as built there were two additional doupleslips for a trailing point ladder track on the CNW trunk and three additional MPD's where the Milwaukee Road track join with the PRR tracks. All told there are 11 MPD's and 9 doubleslip switches, amounts not normally encountered of outside of terminal interlockings.
It is also interesting to note how this interlocking was zoned. As you can see there is the Milwaukee /CNW crossing zone and the Milwaukee/PRR junction zone. In the PRR Zone the PRR was of course calling the shots and all of the signals were position light. The CNW tracks of course has CNW type ssearchlight ignals and the last entrance for the Milwaukee Road was equipped with Milwaukee searchlights. As the interlocking plant was built in 1938, all of the signals were of the most modern type (ie no semaphores) and those original signals remain in service to this day, for the most part.
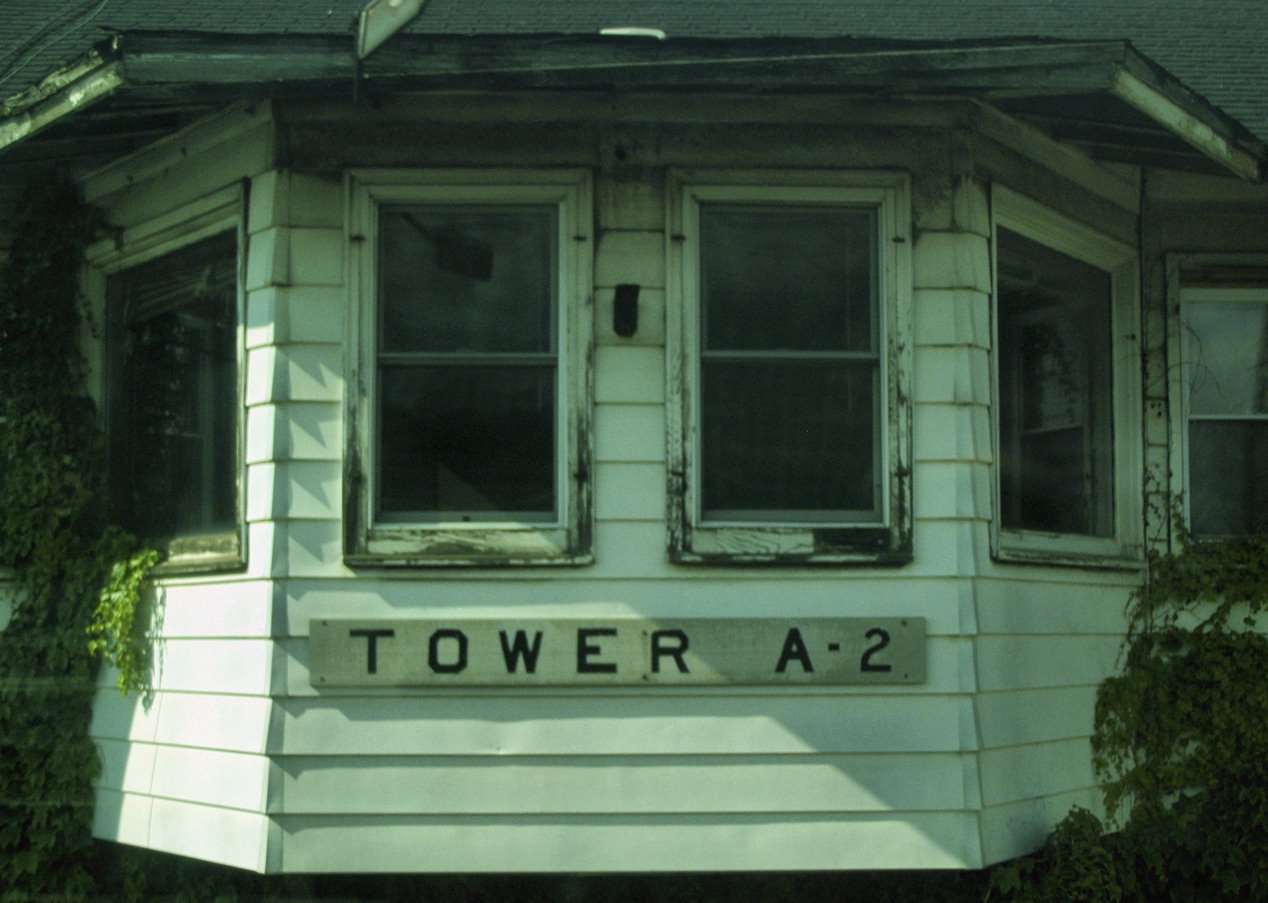
At this point I wanted to mention that the photos used for the essay come from a series of my own trips to Western Ave (exterriors) and from a source at METRA (interriors). My own trips were taken in 2007 on an inbound UP West Line train, 2009 on an inbound Milwaukee District train and 2010 on a trip to the Western Ave METRA station. This first photo of the tower was from the 2007 set.

The tower's architectural influences were clearly from the PRR with the brick construction and large bay window, however the plant was operated and maintained by the Milwaukee Road. The PRR passing into the Penn Central and Conrail has less of an affect on the plant's operations than the Milwaukee Road's ultimate bankruptcy and abandonment in 1981, wherein the Chicago Regional Transportation Authority, later folded into METRA, took direct control of the operations. With its highly complex interlocking plant that continues to resist the call of automation, WESTERN AVE or TOWER A-2 has literally become an ivy covered institution.


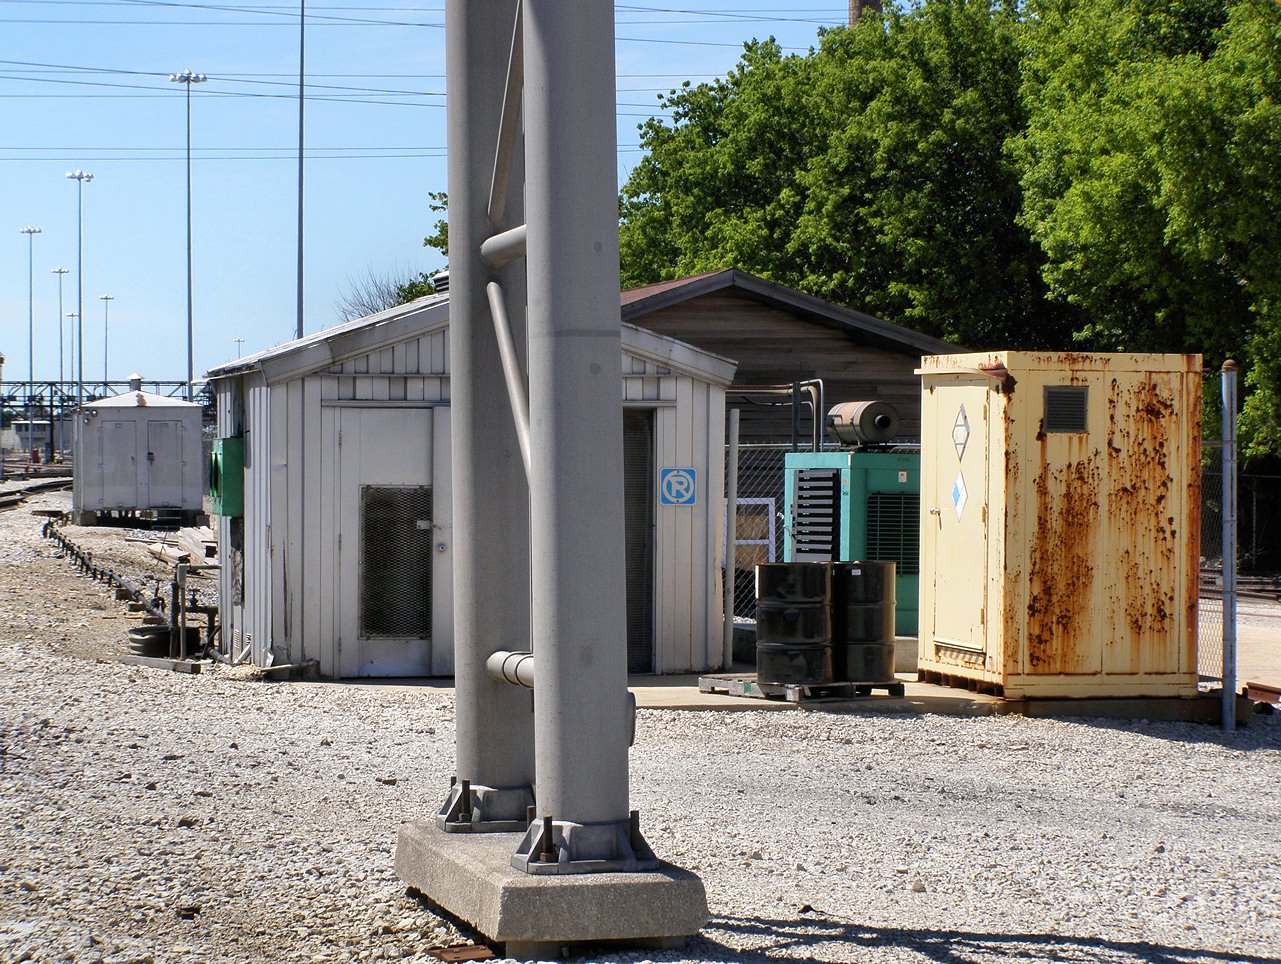
As seen from the adjacent Western Ave METRA station on the Milwaukee District we can see that the tower has its own signal maintainer shop which I'm sure does more than just service the needs of the local electro-mechanical interlocking machine, relays and air operated switch machines...or at least I am somewhat sure about it.

The most significant change to the interlocking plant at Western Ave has been the complete deletion of the former PRR Panhandle Line. After the PC and Conrail mergers and the subsequent reductions in passenger operations there just wasn't any need for a second main line to snake its way through Chicago and enter Union Station through the back door. As a result the three PRR tracks to the west were completely deleted along with three MPDs where the Milwaukee track crossed them. Also removed was the trailing point ladder for CNW freight trains to access the freight yard on the south side of the main line where the interchange with the PRR was located. The 4th Milwaukee Road track was also removed reducing the crossing to a 4x3 and deleting a further 4 doubleslips from the diagram. Finally the most noticeable change came at the eastbound Milwaukee Road entrance where, in addition to the 4th track removal, the leads to the large California Avenue coach yard were re-worked to smooth access for the now united METRA fleet. The result was the 36R and 38R searchlight signals being replaced by non-hooded traffic lights.
Fortunately what used to be the 40R dwarf signal on the outbound track was upgraded with a 3-head searchlight mast when all three tracks were enabled for bi-directional operation.

Here we can see the 38R displaying a Clear indication with the searchlight 40R located behind it. Standing on the station platform you still can't get a feeling for the massive complexity that lays around the curve.

As can be seen in this close up view of the rear of the 54L and 58L westbound CNW signals you can see that the center head is equipped only with a center marker light so the only thing each signal can display is either a straight route or a Restricting indication. While this is to be expected on a ABS signaled line with diverging routes to various yards, this also shows that there was absolutely no interest in CNW trains crossing over to the Milwaukee Road line so even if such a move would lead to signaled track the CNW indication would at best be Restricting.


The second also supports three westbound position light signals for movements through the 4x3 crossing and two eastbound position lights for movements into the PRR crossover section. The same signal bridge also supports the westbound CNW 54L and 58L searchlights. Here you can see the relationship between the middle bridge and both the PRR and CNW sections of the plant.


From this angle you can see the 68R and 66R signals head on. The 68R is displaying a Clear for the next inbound movement, which the 66R is showing off the red Penn Central style lenses on the upper head - - position. This indicates that the plant was at least partly influenced by the Penn Central or Conrail before METRA took over.


In one final shot of Western Ave's interlocking appliances we see the 34R dwarf signal protecting the 17 derail off the California Ave yard lead. The interesting bit is the raised metal 34R label applied to the dwarf signal housing itself.

The last part of Tower A-2 we need to explore isn't actually part of Tower A-2 at all, but the interlocking known as Tower A-3, at the other end of the Western Ave station platform. This interlocking controls the east end of the METRA Western Ave Yard, storage location for mid-day Milwaukee District trainsets. While Tower A-3 interlocking was once controlled by, well, Tower A-3, today it is run from a unit lever machine inside Tower A-2 so I wanted to cover it as well.
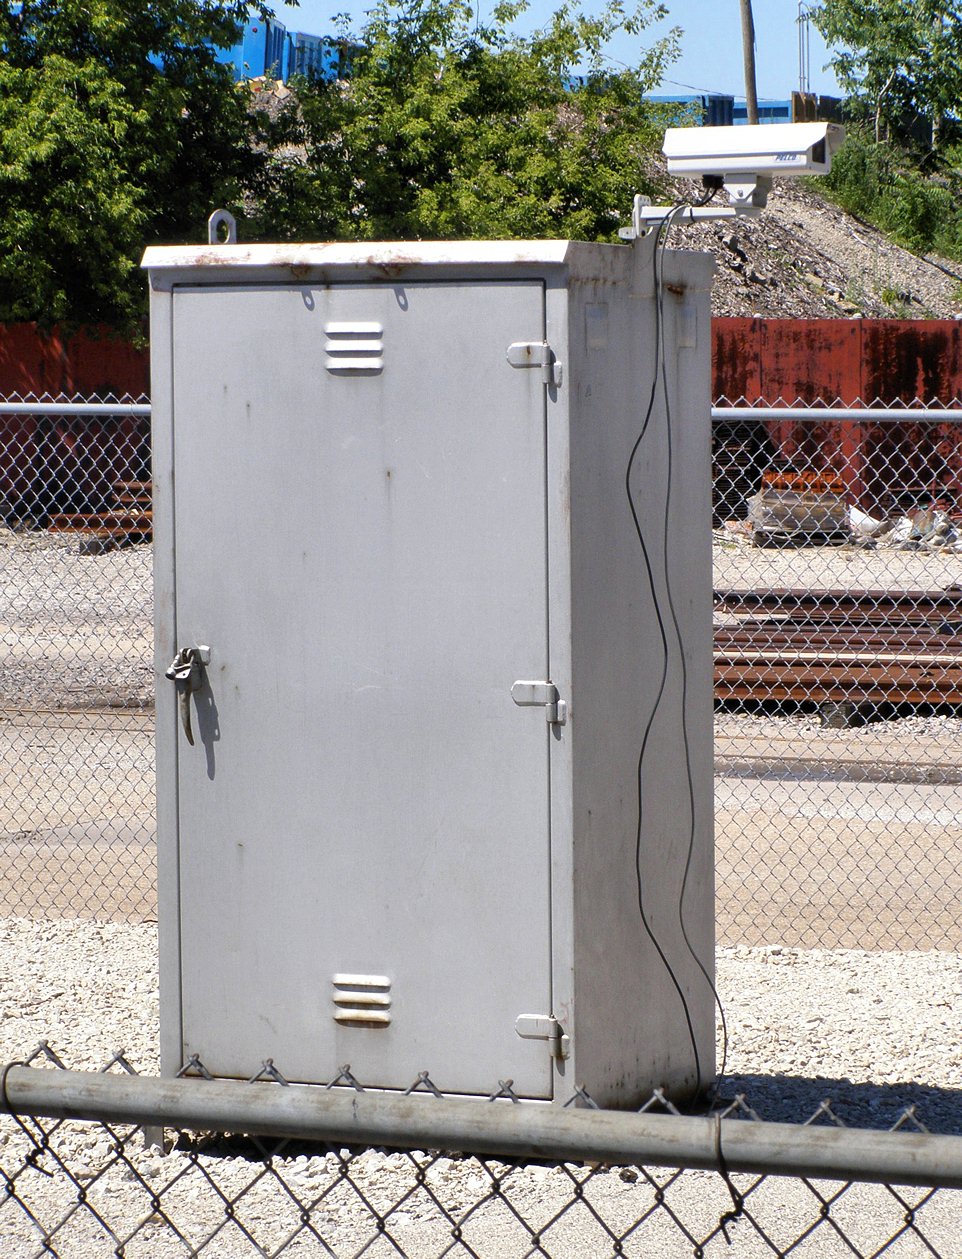
The westbound home signals on tracks 1 and 2 are mounted on a new tubular aluminum gantry structure that was built when the Western Ave station platform was modified. The track 3 signal is on a stand alone mast, although there is a space for it on the new gantry on the short cantilever stub. To prevent mis-routes into the yard and to give operators a good idea of how the passenger boarding is going, a CCTV camera was placed at the end of the track #1 platform feeding a monitor in Tower A-2.

The main track 1 and 2 eastbound signals are both equipped with "bottom yellow" style signal heads for the Restricting indication, even though in this case METRA makes use of a lunar white. This practice of having the Restricting head mounted significantly below the other signal head or heads is from the old practice of using a subsidiary signal, either a ground mounted dwarf of a small semaphore, to give the Restricting or "call-on" indication. On some railroads this gap would be included in the signal rules to differentiate R/Y Diverging Approach from R/ /Y Restricting. Tower A-3 consists of a facing point yard ladder so track 1 does not have any non-restricted speed routes and so is given the two head + gap arrangement. Track #2 has a diverging route onto track 1 and thus has the gap filled for the diverging routes. Here we see track #1 with a clear indication for an approaching Metra train.
Track #3 has no interlocking appliances within the interlocking, but was still included in the plant. The mast for track #3 has a second head, probably for a Restricting call-on type signal, but lacks the Bottom Yellow type spacing seen on the other signals. I suspect that the original track #3 mast was moved from the gantry and placed on its own mast, at which point METRA had adopted Lunar Restricting and had no need for the gapped placement.

The eastbound signals at Tower A-3 are mounted on a classic Milwaukee Road signal bridge and all three of the masts exhibit the gapped bottom yellow type signal head placement. Note the lack of approach diverging indications that show that any diverging move within the first section of Tower A-2's interlocking plant are all done over a Restricting indication. Warning for diverging signal that is able to be displayed on the 68R signal in the east section of Tower A-2's plant would be provided on the eastbound home signals.
Like Tower A-2, Tower A-3 is still a pneumatic interlocking plant with its own air supply.

Here we have a view of the twin yard leads into the METRA Western Ave Yard. The first is a direct lead running straight into a hand operated switch. The second of the two encounters another powered switch before exiting interlocking limits.

In another Delay in Block FAIL, the DIB rule is in effect for the 5 feet between the end of the platform and the westbound signal gantry for all stopping passenger trains. Still the DIB sign must be posted on tracks 1 and 2.

Well that's it for the exterior of Tower A-2. Next time we will head inside to take a look at one of the most impressive US&S Model 14 machine still operating in North America.

No comments:
Post a Comment