In May 2009 (on National Train Day no less) I took the second of two trips on Amtrak's Pennsylvanian between Philly and Pittsburgh. Like my previous trip I bought a business class ticket so I could have access to the rear railfan window. This time around I had much more sunlight available, better weather and an implied verbal consent to stand in the rear vestibule. As a result I managed to take a picture of EVERY signal between ZOO interlocking and PITT interlocking at MP 342. I also took pictures of other points of interest as well as the trains that we passed and that passed us.
My PRR Main Line survey resulted in a collection of over 600 photos so I am going to have to split things up. Part one covers the Amtrak Harrisburg Line from ZOO to STATE, for parts 4-6 we'll move onto the NS Pittsburgh Line from CP-HARRIS to ALTO tower and finally Part 7-9 will cover ALTO tower to CP-PITT. It's not often that one gets an entire set of signal photos for such an iconic main line so I will write up a signaling essay for the entire line. The Amtrak portion in particular is in transition from its 1940's vintage "classic" tower based signaling system to a fully modern one and when I took these photos in May 2009 the new and the old were blending in some quite interesting ways indeed
If anyone wants to follow along the fully annotated line diagram for this segment can be found here. If you are interested in browsing the full photo gallery it can be found here. If you wish to view the photos in their full resolution just right click and click on your browser's "View Image" option.
We start out with the K section of ZOO interlocking the rebuild of which I covered in a the rebuild of which I might cover in a future post. The K section (called that because it used to be the independent K tower) was once again on its way to being a separate interlocking again. Amtrak had grown tired of maintaining and operating an interlocking that none of its trains used. Also, since SEPTA closed BROAD tower there had been communications issues b/t SEPTA dispatchers and the Train Director at ZOO resulting in various misroutes. By transferring K to SEPTA, SEPTA could sort its own trains out as they entered and left Amtrak territory.
Before the new interlocking was placed in service last summer the new signals were installed, yet wired into ZOO's huge 230 lever Model 14 machine. Astonishingly SEPTA chose to install amber PRR position light signals to match what was installed in the rest of ZOO interlocking. Here we have the new 30R and 32R signals on a tubular cantilever mast.

The 40R and 42R used the existing signal gantry.

The new lower heads on the 182 exit signals were still bagged. SEPTA was installing 4-block signaling between there and BROAD interlocking.

Exit signals on the cantilever were completely bagged. ZOO was designed for single direction operation and even tho bi-directional lines were eventually grafted onto many of its routes, the signaling in the interlocking didn't handle them well often requiring slow speed movements.

The 54L signal would eventually become 10E in the new interlocking. This was an interesting choice as it governs movements into the Amtrak MoW yard, which Amtrak will now have to co-ordinate with the SEPTA dispatcher. Hmmm, looks like the new signaling hardware has taken design input from Health and Safety.

The track crossing on the double slips is known as the K Ladder and will remain part of ZOO. The K Ladder provides an alternate routing for trains to/from the main line to New York as well as access to Harrisburg Line #2 track. Notice that reverse direction moves are governed by the slow speed 70L "pot" signal. All tracks in this mess are governed under "Interlocking" movement rules.

Close view of the K ladder double slips. Points in ZOO remain pneumatically powered, points in the new K interlocking are now electrically powered.

View looking into the K section of ZOO. This part of the interlocking splits trains headed on the old PRR east-west main line to Harrisburg from those using the New York main (Amtrak's NEC). NEC trains duck under Harrisburg Line trains using the 36th St tunnel. The 40L and 42L signals are displaying Clear for eastbound movements on new signal masts. I believe those new Amber position lights use LED's, but at least in the daylight the color closely matches the incandescent PRR amber, instead of LED yellow. At night and from off-angles they can look a bit more yellow.

Looking down the 36th St Connector as wee the 98L signal governing movements on #2 track. The 70L signal has experienced a bulb failure, but as a position light the signal is still legible. Of course all of these lines are cab signaled as well. As a point of Philadelphia interest if you look straight ahead you can see a suspension tower from the Ben Franklin Bridge lined up behind the art museum.

So here is the junction of the Main Line and the 36th St connector. In PRR days the Main Line started downtown at Broad St Station (later suburban station) at Milepost 0.0. Later when 30th St station was constructed in the 1930's a connection was built to allow trains not going downtown to use the lower level platforms designed to handle long haul trains. In this part of ZOO interlocking SEPTA suburban trains have the straight route to/from the upper Suburban tracks at 30th St and Amtrak trains diverge to the lower level of 30th St station. The 36th St connector is actually a separate named line in the Amtrak timetable despite only being about a mile long.
Signals are mounted on a unique double cantilever mast. From right to left we have #1 track, #4 track and the infrequently used #2 track. #4 track has the semi-automatic 86R exit signal mounted on the cantilever while again the wrong direction route has a slow speed pot signal. Note the recent concrete tie project has hit everything except the turnouts.

Continuing through ZOO interlocking we encounter the JO section, once again named for a former tower. ZOO basically consolidated the function of 4 towers that controlled the Y junction between the east-est and north-south main lines. Trains on #4 track must make a diverging 30mph movement through JO due to some historical artifacts. The track in the middle of the picture diving down into the trench is known as the New York-Pittsburgh Subway and was used by all of the premier NY-Chicago trains such as a Broadway Limited. Those trains did not stop at 30th St due to the need for a time intensive reverse move. In fact time pressure was so great that the Subway was built as the full speed route even tho more trains were coming off track #4.

Moving through the JO section our train has to make another diverging move from track 4 onto track 2. Back in the day the straight shot would take through trains onto a flyover viaduct. This why the tracks are somewhat out of order (1, 4, 2) through ZOO interlocking. However this flyover viaduct deteriorated to such an extent that in 1994 track 4 was re-aligned not to use it resulting in a diverging move at JO. Here we see the points aligned for this move.

Leaving JO we see the old #4 on the right starting up the ramp, we are on #2 after having traversed the 143 switch and to the left is a yard lead.

We are now clear of ZOO interlocking. Looking back we see the 146L signal displaying STOP and the 142L signal on #1 track displaying Approach Medium. ZOO in interesting as it has automatic signals within interlocking limits. The 28 automatic sits between the 142L signal and the 78L signal at the 36th St connector. However due to the short block length with the 78L at Stop, the 28 auto will display Approach and the 142L Approach Medium.
Moving on out train quickly enters STILES interlocking. Part of the 1994 re-alignment, STILES takes our train back onto track 4, from track 2. In essence they replaced a flying junction with a flat junction. The interlocking uses more-modern colourized position lights and a Limited Speed (45mph) turnout. From this point #2 track actually sees some use. Note the 4W signal at STILES lacks full speed routes as the straight track leads into an unsignaled yard track. STILES is remote from a panel in ZOO tower. Note the 2E signal is unable to display Approach due to the short distance to the 146L. Instead Slow Approach is used with Approach Slow displaying on the distant.

Here we see the westbound signal for PAXON interlocking, also part of the 1994 re-alignment. On #2 track we see a signal for VALLEY interlocking. While VALLEY is still an interlocking on track 2, the switch between track 1 and 2 was removed some time ago so there are no longer any interlocking appliances by the absolute signals on #2 track. This is a common theme on the Harrisburg Line. Lack of capitol funding made Amtrak loathe to do anything that required expensive interlocking modifications, even if the result was somewhat silly.

Here we see the meat of PAXON consisting of a yard lead track protected by a "pedestal" type signal and power derail. PRR pedestal signals were invented for use in the 1927 Suburban Station project 3 miles back down the line as a way to get a "high" signal indications in a close clearance environment. Because the diverging track at PAXON leads into a yard, it is protected by a split point power derail. However this is in no means a guaranteed safeguard as there been at least one runaway incident at this location where the Train Director at ZOO left the switch lined for the yard and a SEPTA MU set just happened to roll out onto the main line before stopping somewhere in ZOO interlocking proper.

Here we see the old flyover track which is still used by a low traffic suburban Cynwyd line. Trains on the flyover are subject to a 15mph speed restriction. The flyover was built to allow passenger trains to bypass the freight yard here at high speed. In 1994 the yard and #4 track alignment were converted into an MU maintenance shoppe for SEPTA. The shop facilities themselves being relocated from PAOLI due to massive PCB contamination. The 4E PAXON signal is visible. This part of the line is signaled for bi-directional operation and the best signal the 4E can give is Approach limited for the diverging route at STILES.

The last interlocking in the 1994 programme is WOODBINE, which provides a westbound escape from the yard. As one can see it is not used frequently. Over on #2 track we see the home signal for OVERBROOK interlocking's Woodbine section.

WOODBINE's eastbound signal was co-located on a gantry with OVERBROOKS's 018 and 020 signals on 2 and 3 track. WOODBINE uses colourized PL's, OVERBROOK uses ambers. This is where the Main Line finally reaches its 4-track configuration. The Woodbine section of Overbrook was used for freight operations into and out of the old Belmont Yard. Today only one switch is left where 3tk collapses into 2tk.

East end OVERBROOK interlocking proper. OVERBROOK is a full 4-track crossover with a connection to an MoW siding.

The still active OVERBROOK tower. Built in 1927, contains a 19 lever US&S Model 14 interlocking machine. The 16L signal is visible next to the tower displaying Stop.

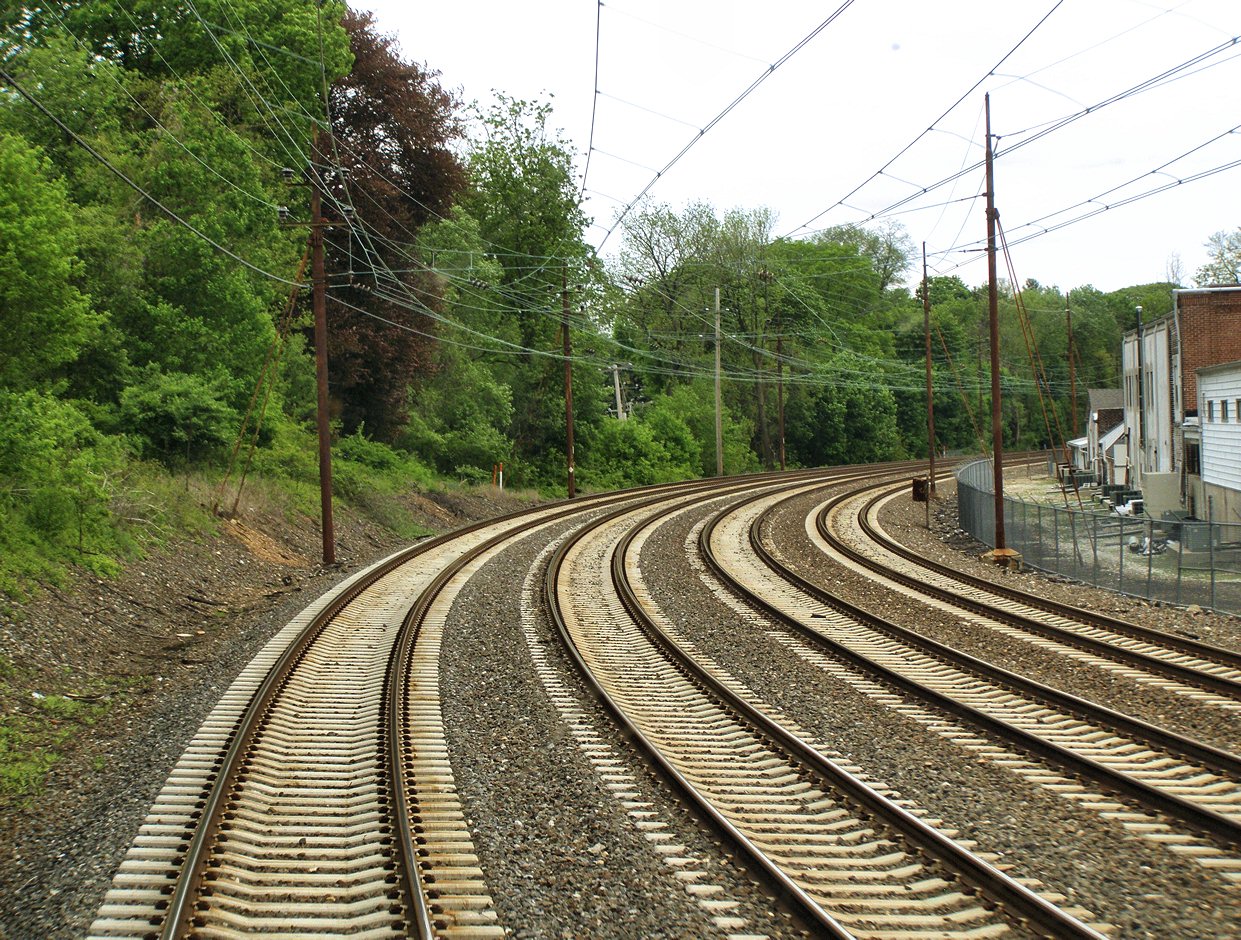
Here we have the station and the west end of the interlocking. The station building is the oldest on the line dating from the 1860's or 50's. Both 1 and 4 tracks are signaled as pockets within the station so express trains can leapfrog trains stopped at the station.

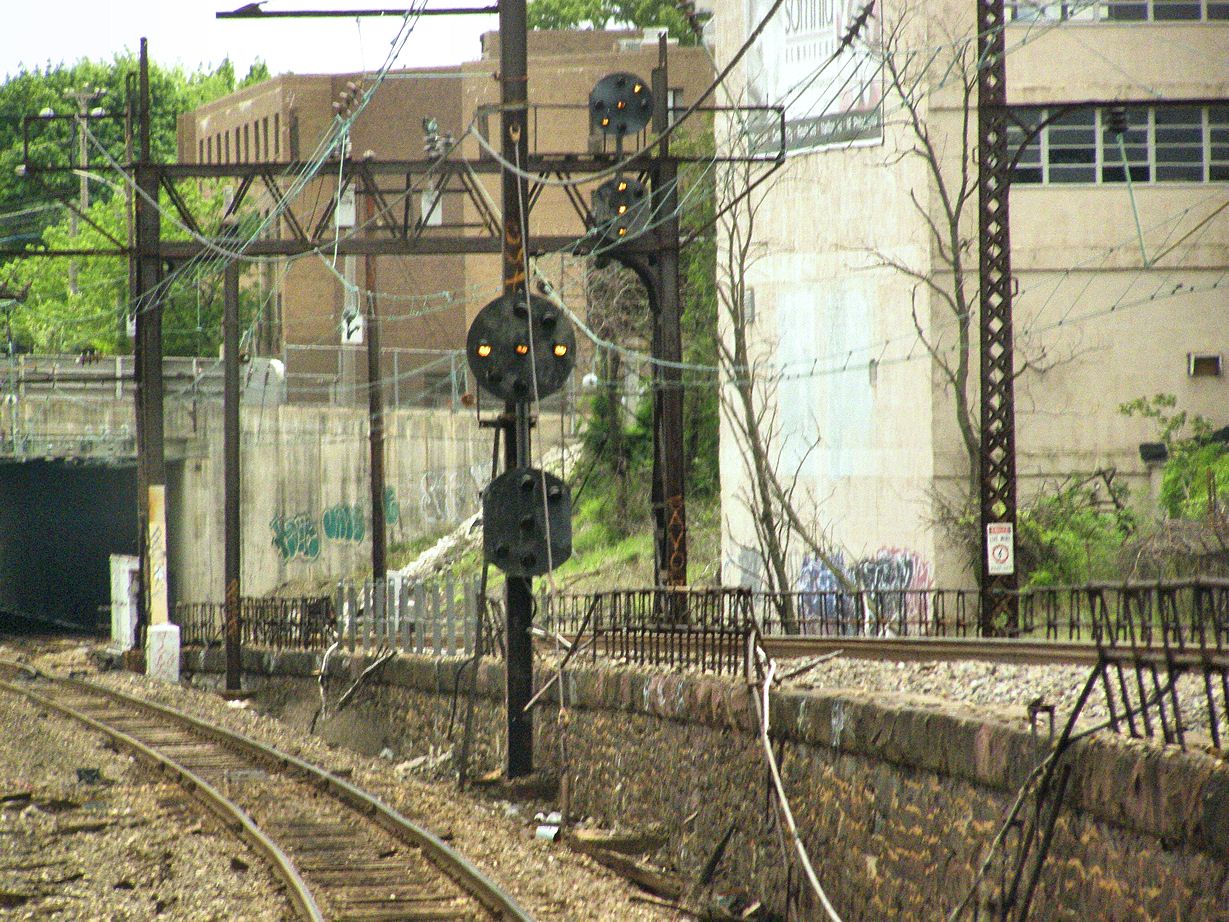
Here we see the eastbound signal gantry for OVERBROOK. Lots of interesting things here. In the background u can see the original position of the gantry, which was moved for better visibility on the curve. Next the 14L signal is displaying Medium Clear for a movement from tk2 to tk2. In the time it took my train to traverse the interlocking the operator pulled up both this signal and the 16L which had been at Stop. Between here and Paoli #3 track and only #3 track is signaled for bi-directional running, thus eastbound signals will cover 3 tracks instead of 2. #3 track also has an exit signal which covers movements from 2tk to 3tk which have to be made past a Slow Approach signal as high PRR signals cannot display Slow Clear. This prevents trains getting stuck at 30mph until the next automatic signal. It also provides a single point to interlock with the traffic direction lever instead of any route that could exit out 3tk west.
Automatic signal 68 at Narberth displaying Approach Medium on 2tk for the Medium Clear at Overbrook. Also note the dragging equipment detectors on 3 and 4 tracks.

Automatic signal 84 at Ardmore. The express Amtrak train has passed dropping 2tk signal to Stop and Proceed. Track 1 displays Approach Medium for the second signal Stop at OVERBROOK. Apparently 1.5 mile signal blocks are considered short. DED's on 1 and 2 track. These automatically drop the home signal at Overbrook. W/B signals here are distants to BRYN MAWR interlocking and can display Approach Slow because of the pocket track at BRYN MAWR results in Slow Approach at BRYN MAWR's home signal.

Westbound signals at BRYN MAWR interlocking. Track 1 is barricaded for a tree trimming crew. The signal on #4 track cannot display Approach, only Slow Approach because of the very short distance to the next signal.

East end crossovers. Like OVERBROOK, BRYN MAWR has a signaled pocket on 4tk.

BRYN MAWR tower and center crossovers. BRYN MAWR built in 1896 and closed nearly 100 years later in 1994 after a fire in the relay room. Control was then remoted to PAOLI. Until that point BRYN MAWR had been a part time tower, open only for the rush hours and set to straight railed automatic mode at all other times. Lattice pole to the left is the base of a bracket mounted signal for the station pocket.

Eastbound home signals at BRYN MAWR. These used to have Limited Speed triangles before the 1994 fire, but they don't now as they were upgraded to display flashing Limited Clear signal. The 3tk signal has only slow speed diverging movements over the more compact switch to track 2. Movements to tk 4 would give a Restricting as they is against the flow of traffic.

118 automatic. Tracks 2 and 3 have (G) Grade markers which allowed heavy freight trains to treat Stop and Proceed as Restricting signals. The PRR Main Line between here and harrisburg was known for its difficult grade profile, which was remedied by several low grade freight routes. Very few heavy freight trains still operate on the line so the (G) boards are another anachronism. Distant signals on tracks 1 and 2 have Limited Speed triangles applied. These were an inexpensive method to upgrade an interlocking from Medium speed turnouts to Limited speed w/o having to install the (then) costly flashing relay and test the new configuration. These are becoming increasingly rare.
Also note how you can see the nicely painted copper green catenary poles abruptly stops. This was a project carried out in the 1990's and paid for by the local county government. Where the new paint stops is where the tracks cross the county line. The catenary poles and electrification date from 1915 and served as the pilot for the future PRR electrification projects.

132 automatic. Traffic on #3 track is set westbound so all e/b signals are at Stop and Proceed.

Automatic 148. The position light units use an internal parabolic mirror assembly, which really stands out at a distance.

Automatic 162 has been integrated with an old road bridge. While the road bridge is no longer used the secondary signaling function has saved it from removal.

Automatic 178 is the distant to PAOLI interlocking on track 3 and 4. The 50mph speed restriction is for the famous Berwyn Curve.

As we arrive at PAOLI interlocking you can see the full coverage on PAOLI's own full page. In part 2 we'll pick up as we depart PAOLI's eastbound home signal.
No comments:
Post a Comment