We resume at the 218 intermediate signal where the Track 1 signal is displaying Approach for the stop at PAOLI's home signal, but it also has the lower Approach Medium | for diverging movements. Because all trains make a PAOLI station stop and diverge at the east end of the interlocking, Approach Medium is rarely displayed on the 218 auto. You can also see the various disused signal configurations that litter the gantry. As built there were 2 signals in each direction. Then track 3 was removed and track 4 moved into its position on the RoW. Track 2 was then made bi-directional which installed a new signal on the beam. Finally track 2 was removed and both its signals were also removed leaving two active signals and 3 inactive signal mountings.
Note the (G) board and the Malvern station in the background. That is the final stop for most local commuter trains at 21.6 miles from downtown.

Next up is FRAZER interlocking. Like everything else it went in during the 1994 relocation of the Paoli yard and shop complex. Instead of rebuilding the #2 track out to the new yard they simply installed a trailing point crossover and pocket track for trains pulling out of the yard. Good news was it got all amber PLs. Here we have the 8E signal with a bulb out governing movements out of the pocket track.

The 4W on the main and 8W pot at the end of the pocket. The 4W can give a Slow Approach for trains entering the yard as there is a fixed Restricting signal at the end of the interlocking. Without the fixed signal trains would have to get a Restricting on the 4W which would slow things down. Trains approaching the 4W at Slow Approach get straight Approach instead of Approach Slow on the distant.

The 1E signal as a commuter train pulls into the pocket track from the yard. Note the vertical | lower head with only a single marker light on the 1E. Also note the hotbox detector. That reads out in PAOLI tower.

Full view of the interlocking showing the 4E pot signal and an HBD-DED on track 1 which reads out in THORN tower.

Next interlocking is GLEN. This is remote from THORN as installed in the 1937 CTC project. GLEN was the flying junction between the Trenton Cutoff goods branch with the Main Line. When built the ML was 4 tracks and the cutoff 2. Today the Cutoff is just an unsignaled secondary track. The ML is two tracks, but here 2 track re-appears from the wet lead to the Frazer Yard. The interlocking is on tracks 1 and 2 only and consists of 2 switches sllowing the Dale secondary track to access either track 1 or 2. Track 2 is bi-directional and not used much, but much slower than track 1 so the Operator at THORN has some discretion on how to route trains. Here we see the 100R and 102R signals along with the 99 switch. Lever numbers correspond to the THORN CTC machine.

Wider view showing the 99 switch.

The 100L can only display Stop and Restricting as east of it the tracks are unsignaled. On track #1 we have the 254 automatic with a (G) board. Note how the overhead wires continue along where 2 track used to continue eastbound.

274 automatic at Exton. Track 2 is good for 40mph passenger, 20 freight. The main track 1 and 4 are good for 90mph west of Paoli. Prior to Paoli tracks 1 and 4 are good for 70-80mph.

298 automatic with (G) boards eastbound. This section of track is paralleled by an abandoned goods line that extended the Trenton Cutoff to Thorndale on a route with fewer grades. The barricades on tracks 1 and 2 are for the track work we are wrong-railing around.

DOWNS interlocking originally comprised a pair of crossovers that would allow trains on the express tracks to shift to the local tracks. A mile up the line at THORN, the low-grade good line re-joined the route and it would be 10 miles before it could split off again so DOWNS was probably built to get Long Haul passenger traffic on the center tracks out of the way of through freight. Later the line from here to PAOLI was reduced to 3 tracks and DOWNS is where line returned to 4 tracks. Here we see the w/b home signals with the barricades for the track work. 72R has only medium speed routes as a straight shot leads against the flow of traffic.

Here we see 71 switch where the bi-directional 2 track becomes the single direction 2 and 3 track. On the left is a hand operated freight siding unlocked by the 75 lever. The siding is equipped with a signal that works off the 76R lever.

DOWNS interlocking as seen from the 69 switch. Field interlocking equipment is located in the tan concrete hut. Deadhead commuter trains access track 2 here traveling from Frazer yard to the Thorndale terminus. Note the pre-fab concrete relay hut.

High 70L and 72L signals on the eastbound gantry. The 70L signal is equipped with a Limited Speed triangle, but its distant (the home signal at THORN) does not.

Unfortunately the line here has seen some attrition. The former 3 track has been removed and the 2 track is out of service. Again, interlocking hardware was left in place to save on costs so the 74L pot signal on 3 track governs an empty right of way.

THORN interlocking consists of a 6-track crossover that knitted together the 4-track Main Line with the 2-track Low Grade extension and a freight yard. My train was running reverse and thus had to cross over all six tracks at THORN, even tho only tracks 1 and 4 are really being used. In fact THORN is where the local commuter service terminates and all trains that turn around here must make the crossover.I will be going into much greater detail about THORN interlocking in a later post and will leave some of the historical details to then.
Here we see #1 track, #2 track, which is out of service about 1500 feet beyond the end of the interlocking, the goods line is reduced to 1 track which itself is just a stub and ends at the home signal, #3 track which also ends at the home signal and finally #4 track. Crossing over is done at Restricted speed (15mph).

Crossing over at THORN from track 1 to track 4 in the west direction takes a train over 5 separate crossovers, 41, 45, 51, 55 and 61. There is no real need to go into too much detail about this move, so I'll just show the series of photos. We begin with the 45 switch.

Then move onto the 51.

Then pass the 49 switch for the opposite crossover ladder.

Then cross the 55 switch.

And finally onto the 61 switch.

Before finishing the move at the 60R reverse direction dwarf signal.

This is what it looks like on the THORN CTC machine, which had direct wire control over the local plant. Again I will be going into greater detail on both THORN tower and its interlocking in future posts.
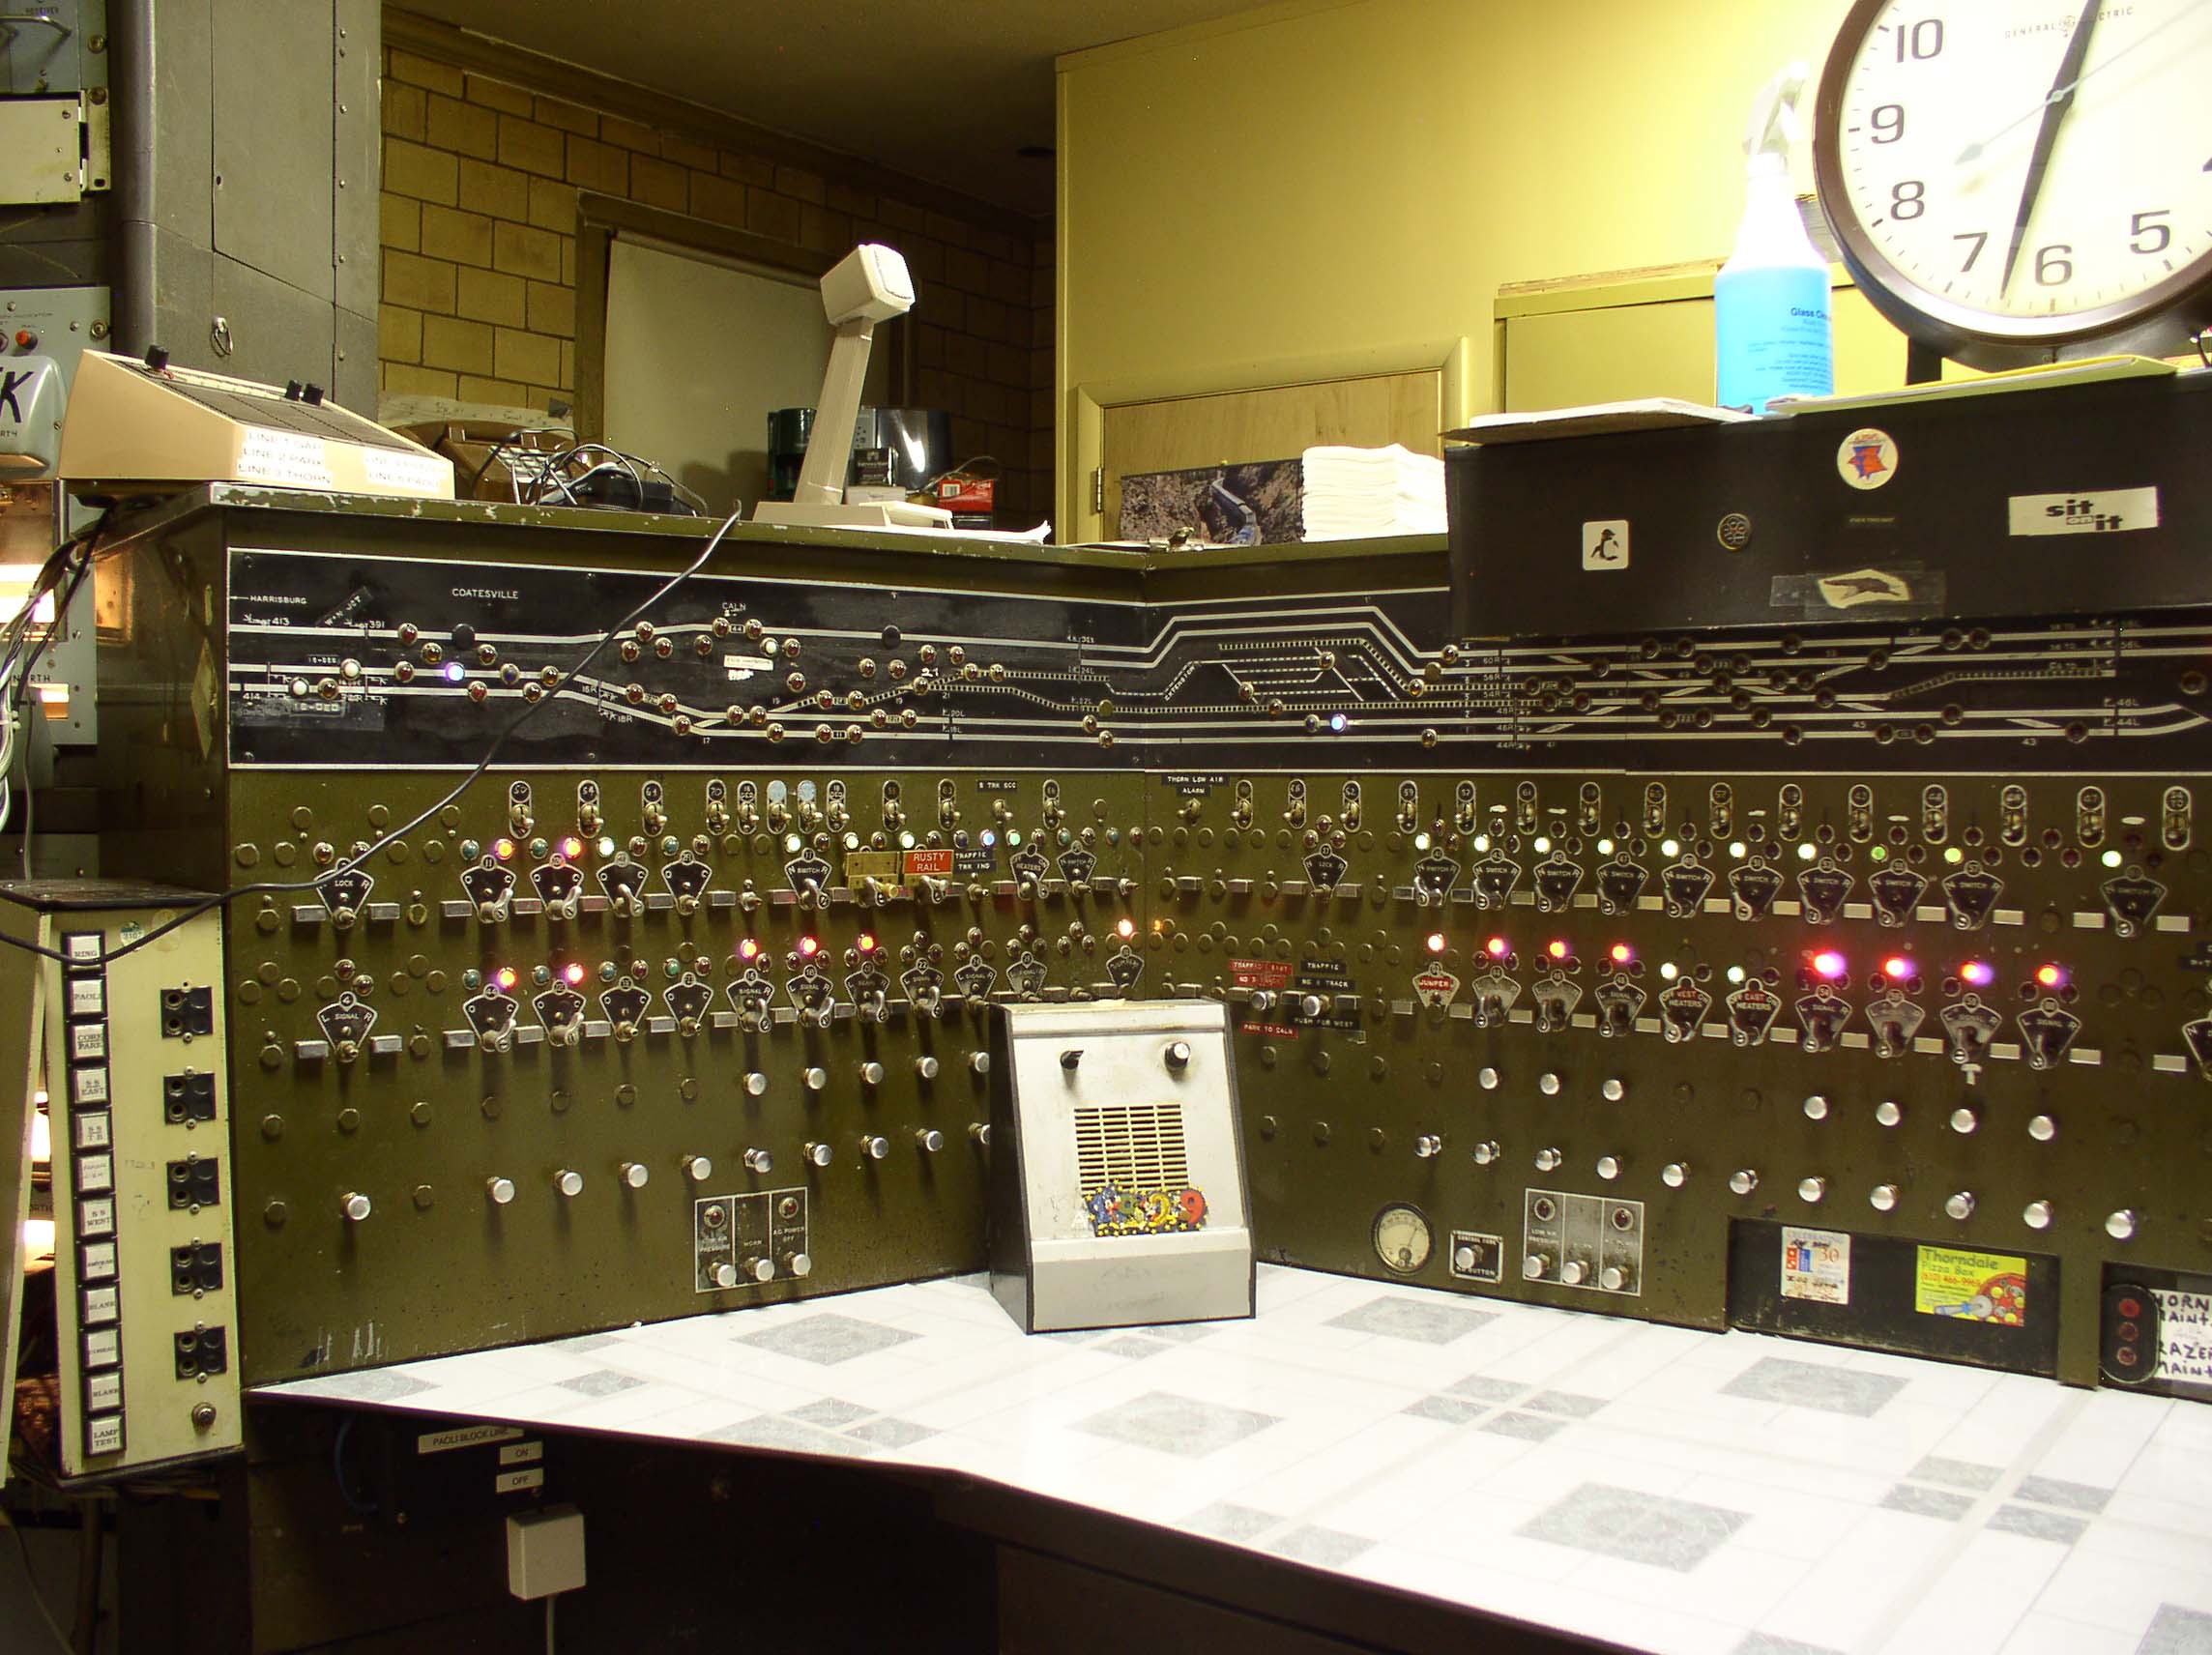
THORN tower is manned by a train director and is in charge of interlockings from FRAZER to CALN as well as overhead catenary power, defect detectors and point heaters.

Reverse direction pot signals 60R and 58R into THORN interlocking. Out the west end of the interlocking #3 track is stubbed as is 6. #5 track is a yard track, #2 track is a siding and #1 is a main track. Wow, all that overhead catenary is crazy!!

6 track is used for MoW equipment.

Spanning the eastbound tracks is another catenary signal gantry with the 44R, 46R and 48 R high signals. All three allow for full Clear straight routes onto the eastbound P&T and Main Line tracks 2 and 1 respectively.

Ok, that's it for Part . In Part three I will cover from Thorndale to Lancaster.
No comments:
Post a Comment