
The first, and perhaps foremost reason, was that this was simply not a priority route into Chicago. For the New York Central and PRR, this was not used by the streamliners making their grand entrance into Chicago from New York, but instead something more like the service entrance used by delivery vehicles. For the NYC all this route did was act a way to interchange freight with "western" roads. For the PRR the situation was essentially the same except for a smattering of passenger trains using the "back door" at Union Station to reach such thrilling destination as Indianapolis and Cincinnati. Only for the B&O was this their primary route into a downtown passenger terminal, but the B&O had long since given up trying to compete on time with its larger rivals, instead focusing on luxury. While the crossing did affect the Alton main line, the Alton was the priority user with the Pennsylvania Railroad being responsible for maintaining the crossing protection as the Panhandle railroad was built after the Alton. However being first is not always an advantage as whatever agreement was struck with the PRR would remain in effect even if conditions later changed. If the Alton had signed off on a non-interlocked crossing and did not wish to renegotiate then a non-interlocked crossing it would stay.
 |
| As you can see Brighton Park was not the B&OCT's biggest problem in reaching downtown Chicago in a timely fashion. |
The third reason is a bit softer, but one that I believe is still a strong unconscious motivator to preserve a status quo. If Brighton Park were to be interlocked, it would become more susceptible to policy capture and with the PRR pulling the levers the other railroads preferred leaving routing decisions in the hands of low level employees instead of higher level managers. Because it was not an interlocking Brighton Park was worked by switchtenders, which is even lower on the totem pole than a tower operator. They would be out and about, in full view of the crews and even switchtenders from other railroads. In the absence of some high priority passenger train there would be strong social pressure to be as fair as possible with regard to which train was allowed through the diamonds.


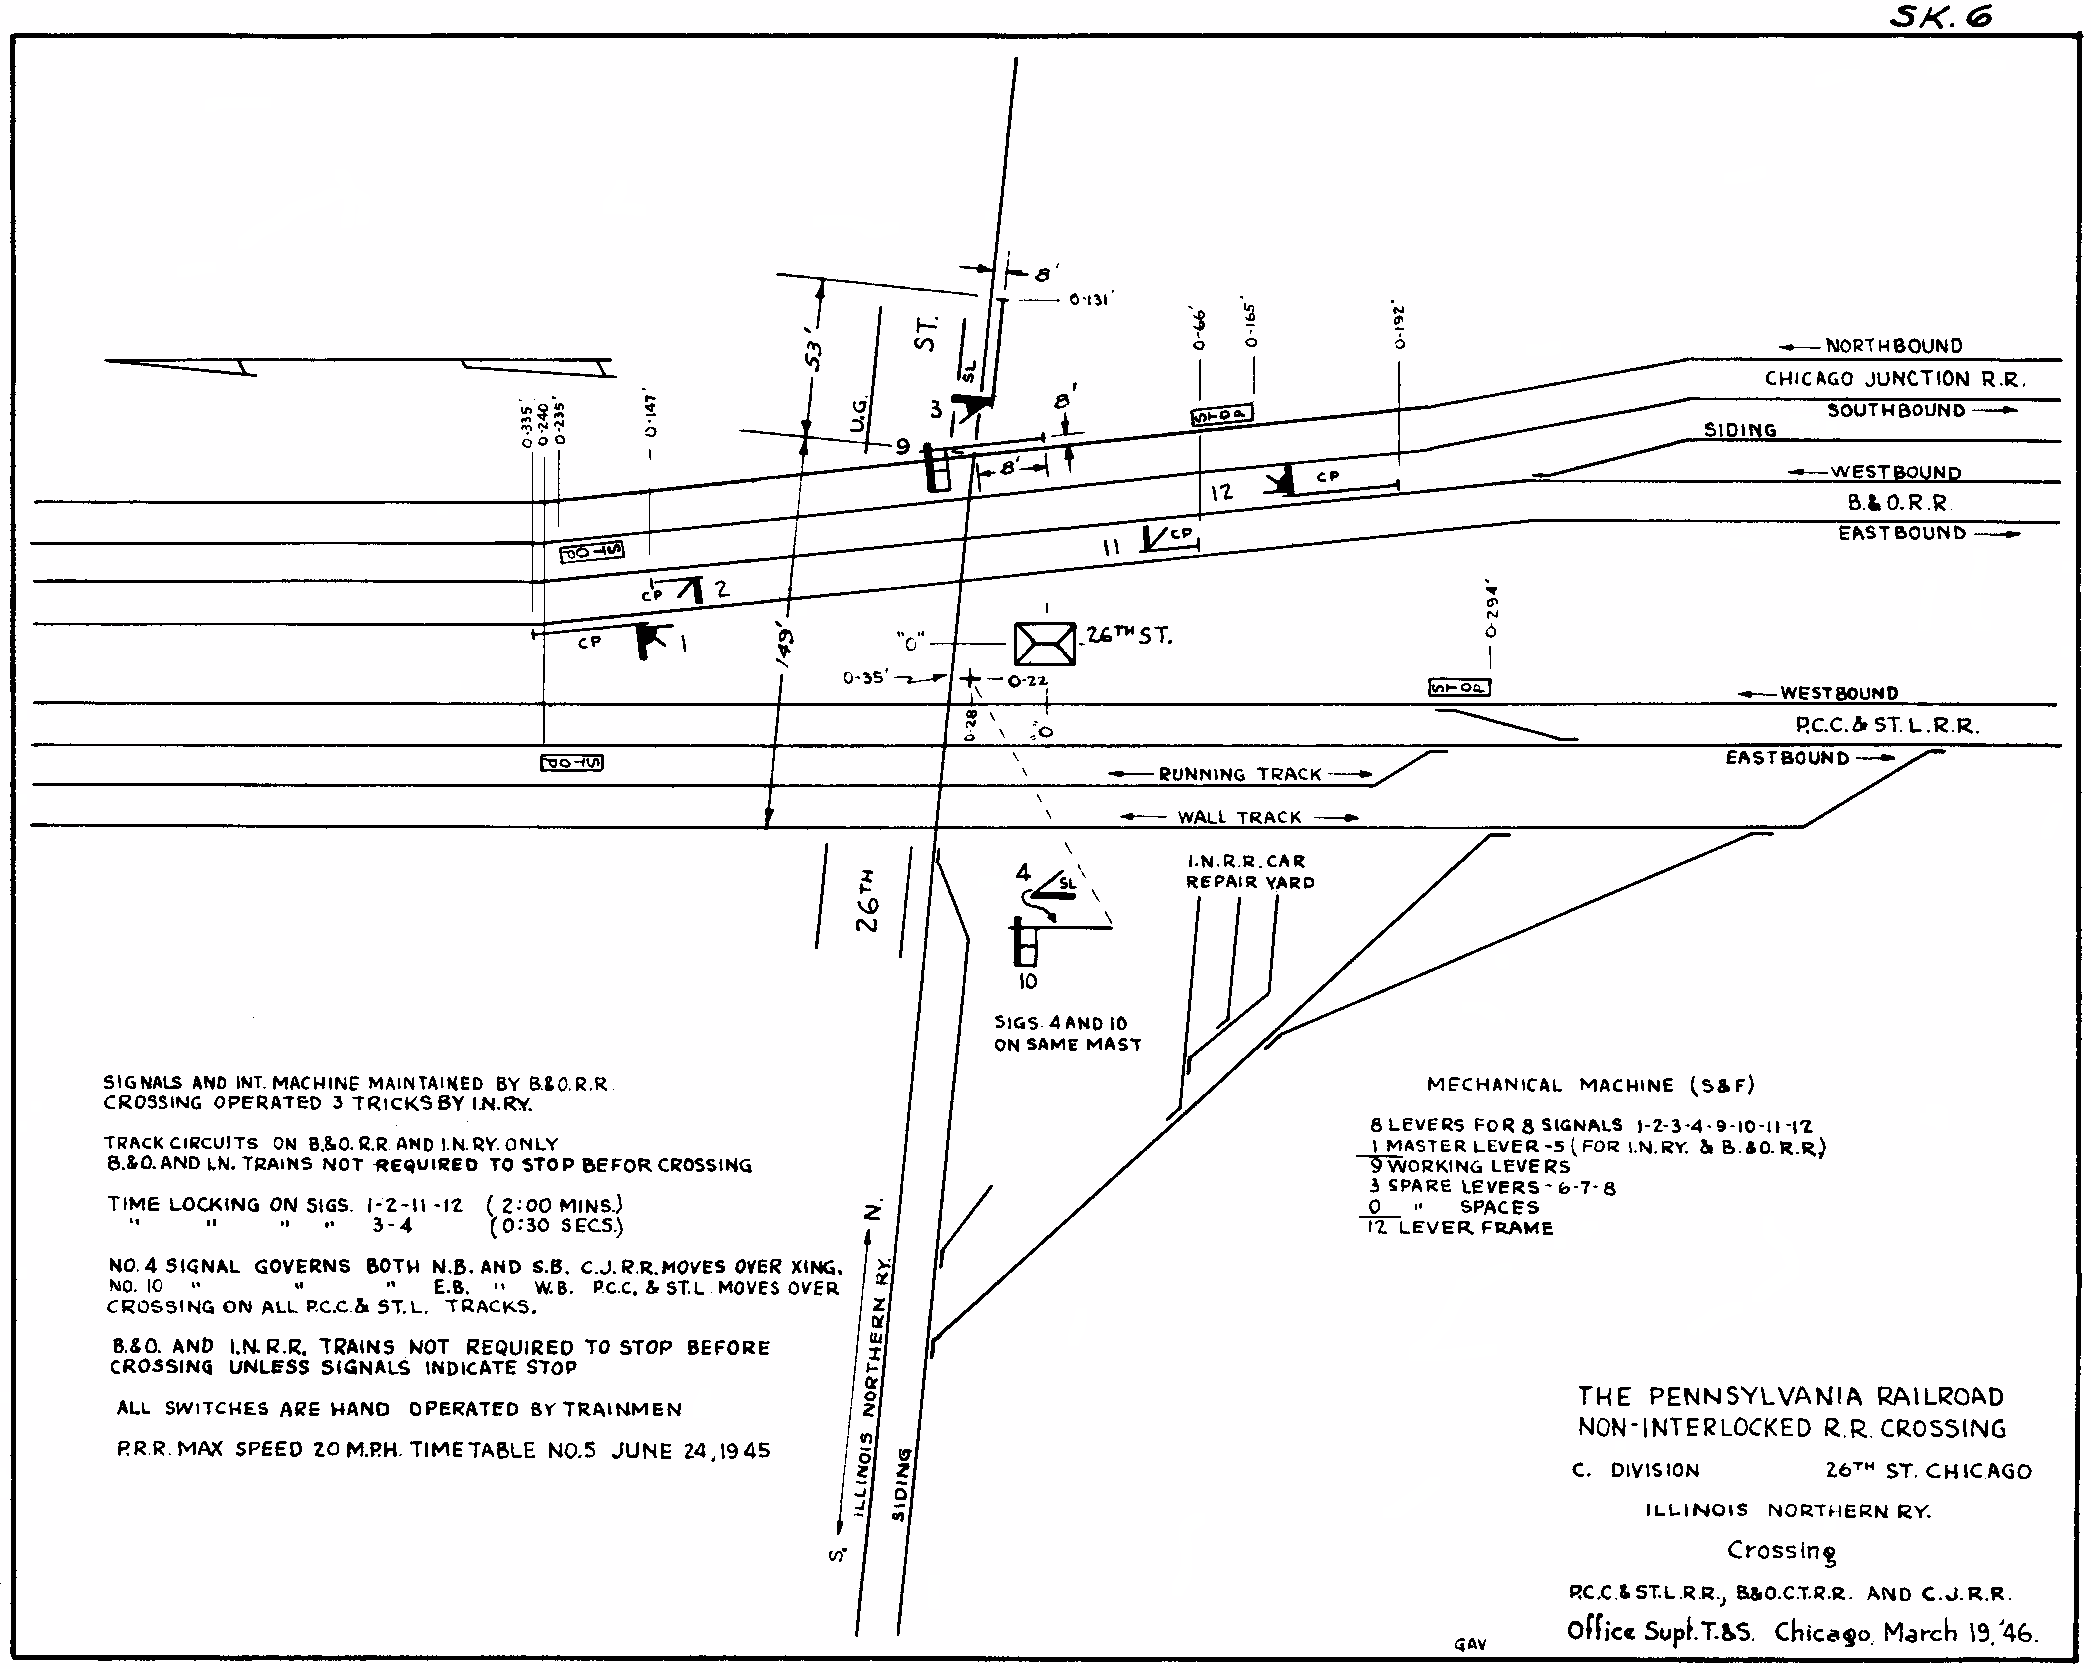
Of course the mechanically operated semaphores at Brighton Park became its most iconic feature. At the time of its closure there were 8 signals still in operation, 5 on the central bracket mast and 3 on a secondary mast in the northwest corner of the crossing. These were directly operated from an 8 lever S&F mechanical frame via pipelines. The system was simple. When it was time for a train to proceed across the crossing the switchtender would raise the semaphore corresponding to the line and direction. The B&O, PRR, NYC and Alton each had 1 semaphore for each timetable direction for a total of 8. The B&O, Panhandle and Northbound Alton signals were mounted on the bracket, NYC and southbound Alton on the single mast. After Conrail abandoned the PRR Panhandle main line, a single ex-PRR running track was left in place for industrial work and it inherited the Panhandle semaphores. The lever frame provided basic mechanical locking to prevent conflicting movements from being routes (ie Alton xor anything else). Check out Jon Roma's Flickr page for additional photos of the semaphores and pipeline system.

I mentioned before that the B&OCT had wye connections with the Alton. As you can see, with the Panhandle route standing in between the B&OCT and the Alton something had to be done. This came in the form of two additional semaphore signals which would protect the diamond crossings of each wye track with the Panhandle main line. The south wye was protected by an additional 4 semaphores worked from a 4 lever mechanical frame at the opposite end of the "A" tender Shanty. The north wye was protected by a similar set of 4 semaphores, this time worked by a miniature lever frame next to the mast outside of the "B" tender shanty.

Since the 1940's and the resulting contraction of rail traffic, Brighton Park has been rationalized into the form we know it today. You can find a complete rundown of the current state of Brighton Park on its own Chicago Rail Junctions page, but in summary, the former PRR Panhandle main line was completely ripped out leaving just the single industrial track behind with Conrail shifting traffic to the former New York Central line. The B&OCT dropped its wye connections to the Alton as that route decreased in importance and other interchange points became available. This reduced the number of diamonds to 10 in a 2x5 configuration. Without the wye tracks all the many switchtender positions and tender shanties were eliminated including the PRR "B" shanty and the two semaphore masts protecting the wye tracks. This left behind the "A" shanty and the 8 semaphore signals guarding the Alton crossing itself.

Like i said before Brighton Park isn't an interlocking and without the need to either house relays and electronics or keep them dry, the operating environment is rather minimalist. There is a door, some windows, an air conditioning unit and an external portable toilet. Even calling this a "cabin" would be generous and just about the only thing Brighton Park has in common with an interlocking tower is "Tower Window Syndrome". In this view you can see the pipelines emerging from the shanty's lever frame and passing through a set of cranks before running out to the two masts.

So this brings up another interesting question. How did Brighton Park come to be one of only two remaining places in North American with mechanically worked semaphores ( or at least places that I am aware of, not counting tilting targets)? In Europe and much of the rest of the world mechanical signals are actually quite common and are used for all sorts of main line junctions and not out of the way crossings or block stations. Without getting into the full history of interlocking development in North America vs Europe one reason was Europe developed high density interlocking and signaling before the United States and by the time automatic signaling became available mechanical working had already been codified. Also the United States has fewer people available to work fewer trains over more route miles. Such circumstances made automated signaling or no signaling preferable to mechanical signaling and its resulting staffing requirements. Finally, because the United States was an early adopter of electric signaling, by the 1920's it was possible for regulators, both state and Federal, to outlaw all sorts of mechanical practices that can still be found in Europe today and includes things like mechanical train detection. Another regulatory requirement was something call SS protection.

SS Protection stands for Switch-Signal protection and is a form of interlocking logic mandated in the 1920's that requires that signals drop to their most restrictive position if anything happens to disrupt the route like a switch machine throwing, a track circuit dropping, etc. Prior to this where were a number of notable failures, mostly in power interlocking machines, where points could throw yet go undetected by the interlocking logic with non-restrictive signals being then displayed. As you can see in the above photo the mechanical semaphore pipes are fitted with circuit detectors to electrically detect their position, but a device to automatically set the mechanical semaphores to Stop goes against what mechanical operation is and does. As a result no mechanically worked semaphore could be used on any route that displayed a signal better than Restricting relegating mechanical semaphores to use at non-interlocked crossings and bridges and manual block stations.

By 2007 it was shocking that the pipeline system was sill functional at all, especially for the northeast mast which required 3 pipe runs under 6 tracks and through a 90 degree turn. While not as long as most interlocking pipelines, the bent and twisted pipes still made for quite a sight.

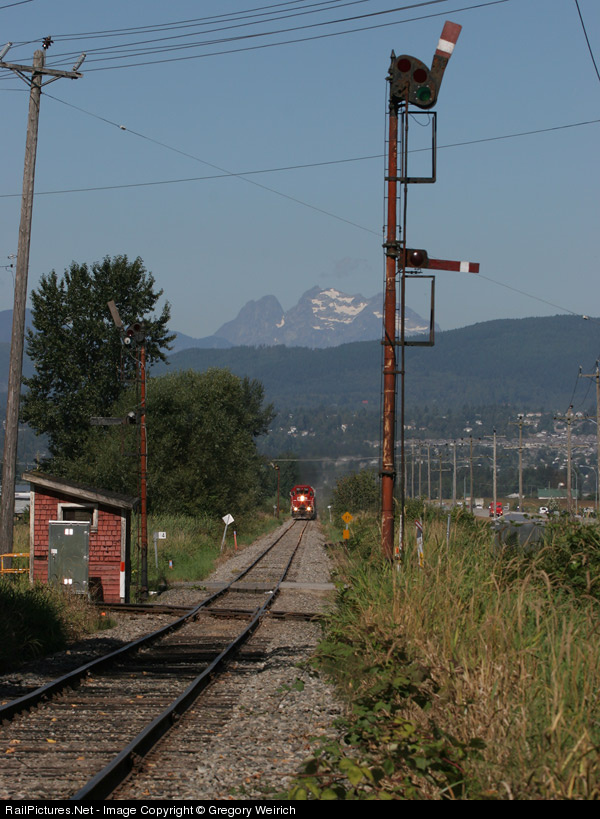
The semaphores themselves were uniformly painted yellow with a black stripe and had a mix of pointed and squared ends. For those of your crying foul since pointed end semaphores are for automatic signals you would be correct and going back a few decades the semaphores were in fact uniformly square ended, the shape for absolute signals, but since then pointed end replacements were used as rules regarding automatic status moved from semaphore shape to presence of a numberplate. Moreover some of the blades used the more common red and white paint for absolute signals (NYC and Alton), which others (PRR and B&O) went with yellow. This represents the practices of the respective railroads. On some semaphores only the first and last positions were used with the normally "yellow" spectacle being blanked over while others went with the alternative R/R/G setup.

Here is a closeup of the central bracket showing the pipeline split between the shanty and the two semaphore locations. The semaphore for the historically northbound Alton track is displayed for Amtrak's passing Texas Eagle. Again, the old "red" painted square end semaphores have been replaced by yellow pointy end units. One theory could be that the red paint faded and Conrail grabbed surplus automatic blades to replace them.

Another important part of the crossing are the Stop signals which perform the bulk of the heavy lifting rulebook wise. Each of the three railroads used their own method of Stop sign. Here on the north sound truck we see CSX and NS stop signs side by side.

The former Alton route, now operated by Canadian National, combined Stop signs with fixed R/R Stop signals. As a GCOR rulebook railroad CN also takes care to inform you that you are leaving CTC territory, however briefly.

Here we see the crossing approaching on the Alton from the south from a train that just passed through the crossing from the north. Note the semaphore which had been displayed two photos ago has been replaced in the Stop position.

Opposite the Stop signals are standard absolute CTC signals that re-admit trains back into signaled territory. Not sure if there were any special instructions regarding if a train needs a signal out of the crossing before the tender can signal it into the crossing, but under most situations the train could back up and wait.

The former B&OCT main line lacks this sort of in and out of CTC signaling, instead relying on automatics for protection. That s where those track circuit interrupters come in, only allowing the ABS signals to display something other than Stop and Proceed if the Semaphore is in the proper position. Note that having a Clear signals on the ABS signal does not relieve a train of stopping at the crossing because once again it is not interlocked and lacks things like timers. Here is the N-63 ABS signal governing the traditional northbound track sandwiched between a pair of Stop signs. In the 1945 diagram this was actually an absolute signal that would display Stop when the crossing signal was not displayed. The southbound equivalent would, in addition, display Stop if any of the hand crossovers were not properly aligned and Restricting for routes down the north Alton wye, provided the "B" shanty semaphore was properly displayed.

On the other track the ABS was mounted a few thousand feet to the south on a bracket mast next to the CTA orange line tracks. Southbound trains would get some sort of advance ABS indication at Ash St crossing. The NS line didn't have to worry about block signals because, until this re-signaling project, it's official status was an un-signaled industrial track.

Brighton Park was re-signaled as part of the Chicago Region Environmental and Transportation Efficiency Program (CREATE) and going back to PRR days NS inherited ultimate control of the interlocking and the re-signaling project. Here we see the new 4-track northbound cantilever signal that follows current NS practice by being both a 4-track cantilever and the use of tombstone target Darth Vader signals. The exception to this are the bottom heads on the B&OCT tracks as CSX uses 4-lamp heads due to its insistence on using lunar white for Restricting and Safetran doesn't make a 4-lamp tombstone target. The project installed signaling on the C&RI all the way back to the junction with the Chicago Line at CP-519 and a bypass track around Ashland Ave yard.

If you are wondering why so many signal heads that has to do with the BNSF connection at Ash Street Crossing. While the Alton connections were dropped, Conrail did eventually install a hand throw connection from the former NYC tracks, across the B&OCT and then connecting with the former ATSF line heading toward Corwith yard. This would also connect with that orphan industrial track on the far side of the Brighton Park plant. In fact, these hand operated switches were still the responsibility of the Brighton Park switchtender to get out and throw (albeit with a longer walk since the "B" shanty was removed).Well the CREATE project would turn this hand throw connection into a fully signaled part of the new Brighton Park interlocking. The slow speed route over the BNSF connection was only accessible from the inboard NS track and both CSX tracks requiring three headed signals for each. The outer NS track could make do with a simple two headed signal serving as the distant to Ask St.

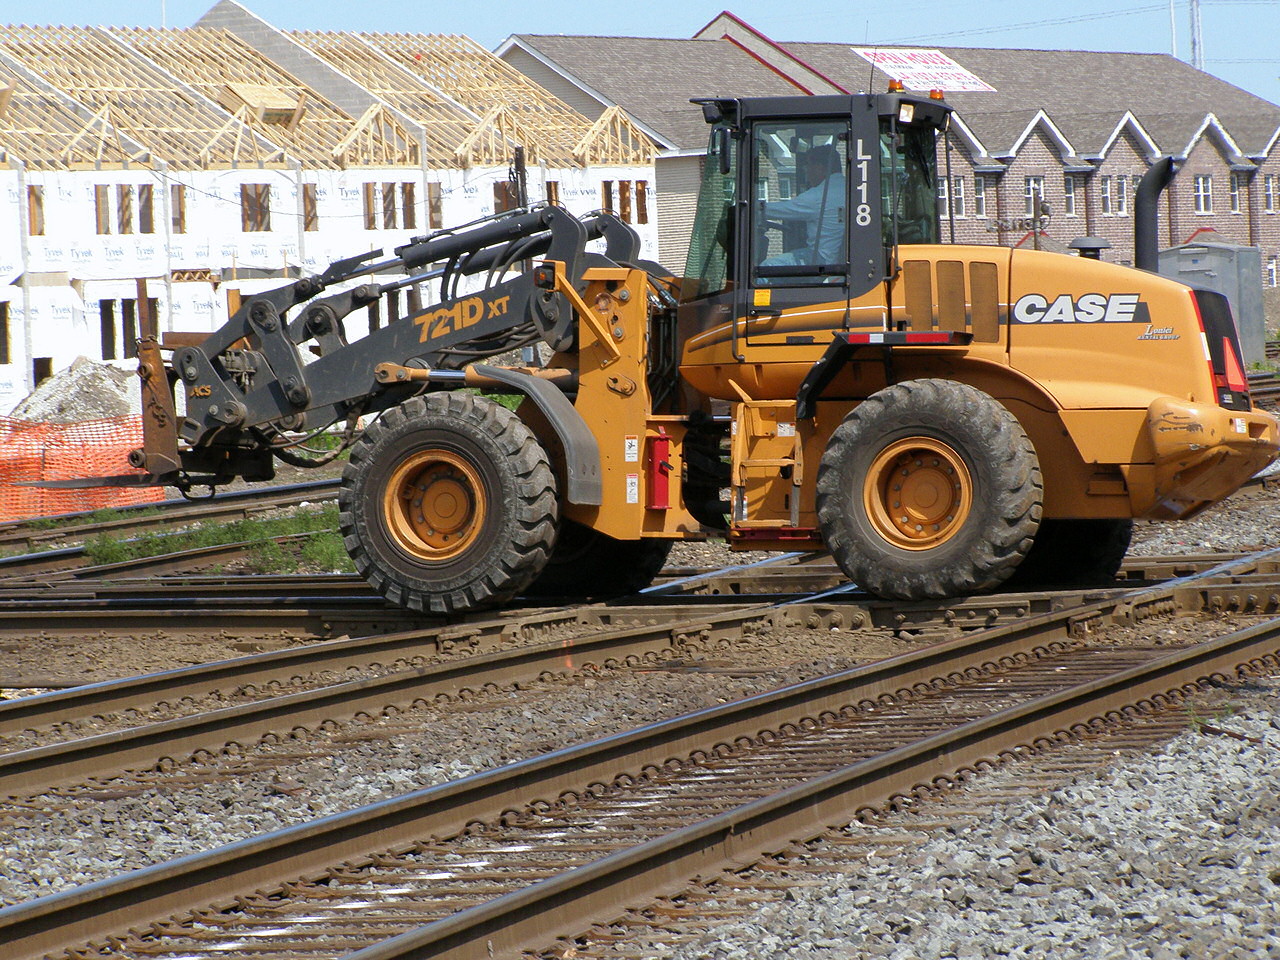
In addition to the signaling aspects of the crossing, 80+ years of use had pounded the 10 diamonds and their sub-structure into a rather dysfunctional state so MofW forces were getting ready to not only rip out the existing diamonds, but also move in tones of new ballast to completely re-grade the crossing and its surroundings. When I was there prefabricated diamond and track panels were being hauled into place by construction equipment.

The forces that be who were re-signaling Brighton Park were not completely oblivious to its historic context and the semaphores, pipeline hardware and the masts they were attacked to were preserved and, I believe, sent to the Illinois Rail Museum. The shanty was also slated for preservation and carefully lifted from its foundation and wrapped in a tarp to await transport. unfortunately, as is so often the case with wooden railway structures, the shanty was set on fire by vandals unknown resulting in a total loss of the artifact several months later.
 |
| RIP Brighton Park Shanty. |
This comment has been removed by a blog administrator.
ReplyDeleteI may still have some pictures of the interior levers used to operate the semaphores. I was a switchtender there in the early 2000’s and it was a very satisfying job that I was lucky to have enough seniority to hold. If you’d like, I can see if I can find them, scan them, and send them to you. Just let me know.
ReplyDeleteWow, that would be great, thanks! You can send them to sturmovik@gmail.com
Delete